People often think that upgrading the CPU on a laptop is impossible and very risky. The reality is that this is certainly not the case, unless the CPU that is installed in your laptop is BGA. The reason is because BGA (Ball Grid Array) CPU’s are soldered onto the motherboard and cannot be removed. Below, I will explain how to change the CPU in a Dell laptop.
Pre-requisites and tools to have before upgrading your CPU:
- Check the compatibility of your new processor with the motherboard socket and chipset
- Multi-purpose screw driver
- Hard plastic card
- High-quality thermal paste
Doy you need help with computers. Please fill in the form below and we will do our best to help you
Step 1:
Remove the battery. Remove all the marked screws on the bottom of your laptop. Different laptops have different screw configurations, newer laptops have screws underneath the battery, so make sure you unscrew them before proceeding.
Once removed, put the screws in a bowl so they don’t get lost.

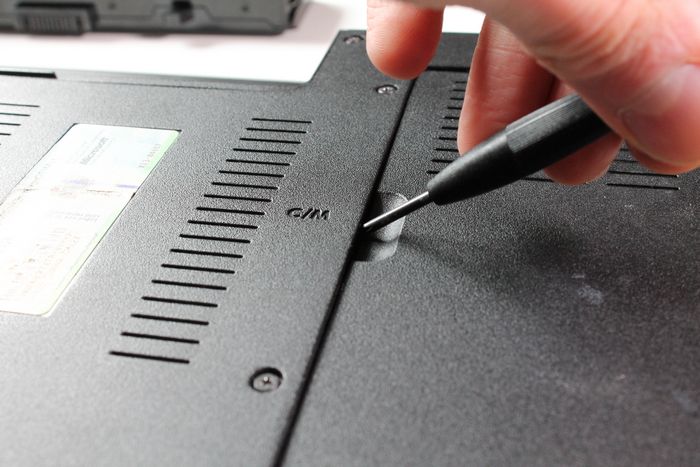
Step 2:
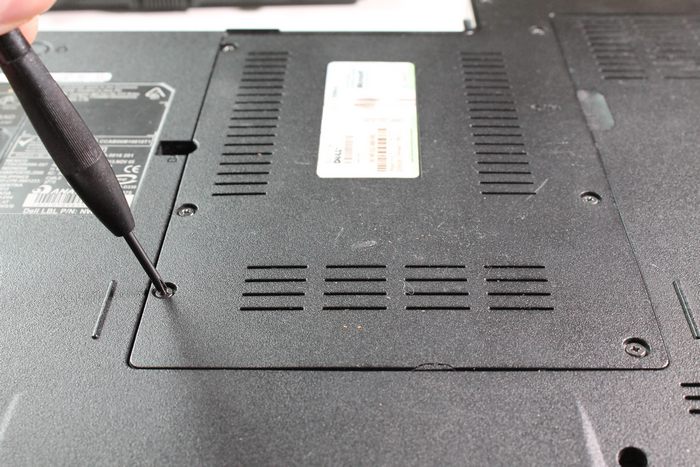
Since we will be using an old Dell laptop with a pPGA478 socketed Celeron processor, it is simple to upgrade the processor, since all we have to do is remove the back panel as shown below.
Once the screws have been removed from the panel which houses your Windows key, proceed by using the hard plastic card to remove the panel completely.
You can also use your screw driver to lift the panel. If not careful, you can damage the components, so we suggest using a hard plastic card, especially for beginners.
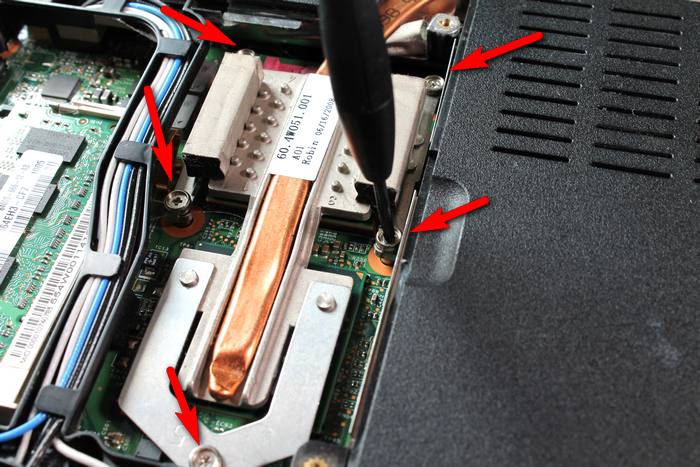
Step 3:
Once the back panel is removed, you will notice a copper heatsink.
Unscrew all five screws attaching the heatsink in order to reveal the processor.
At this point, be careful! There will be two chips – the CPU and Chipset. You should never touch the chipset of the motherboard.
CPUs are placed in the socket, while chipsets are soldered on the board, this makes it easy to identify the correct chip.
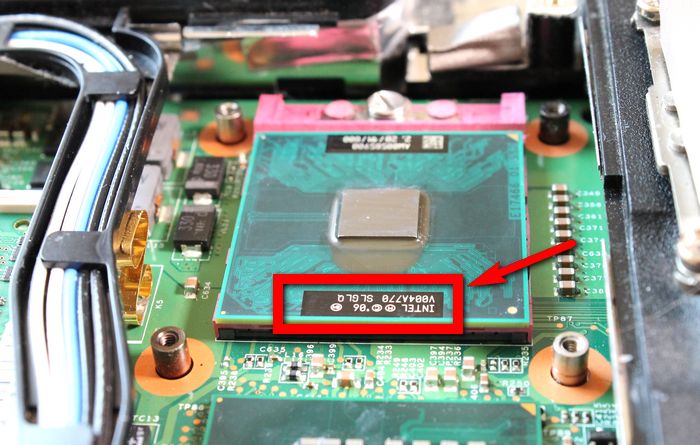
Step 4:
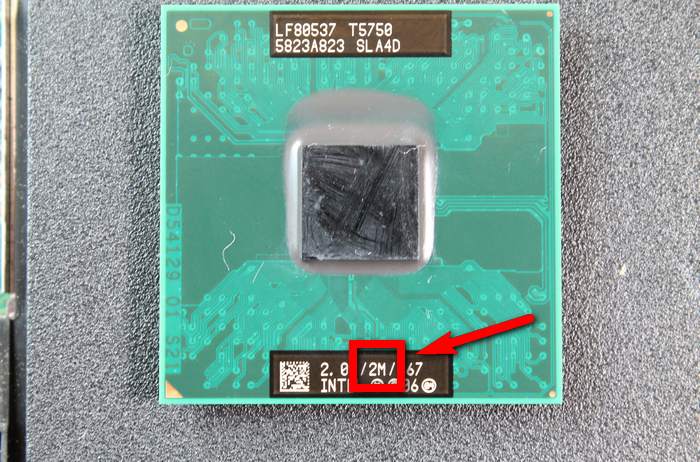
If you are still finding it difficult to distinguish between the chipset and the CPU, then you must check the part number of both chips. Usually, the chipset does not have any part numbers on the corners. The chip which says the word Intel along with something similar to “2.2/1M/800” is the CPU.
2.2 GHz CPU frequency
1 MB Cache
800 MHz Graphic speeds
Step 5:
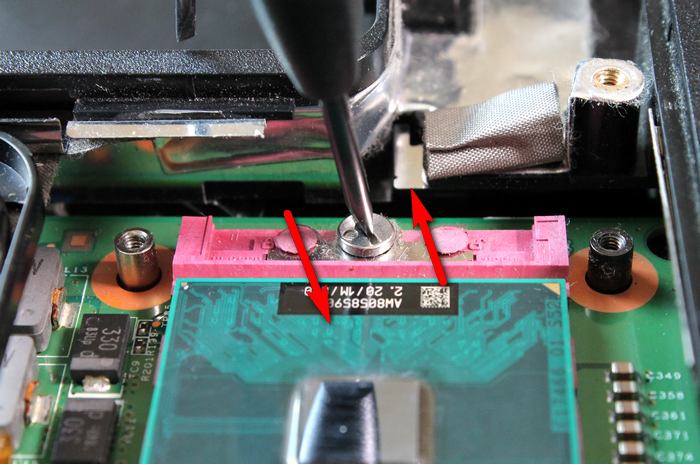
Once you have identified the processor, it is time to remove it from the socket.
Take your screw driver and loosen up the silver which will unlock the processor from the socket.
Remove the processor carefully so that you do not damage the pins. Check by following the images below.
Step 6:
It is now time to install the new processor in your laptop.
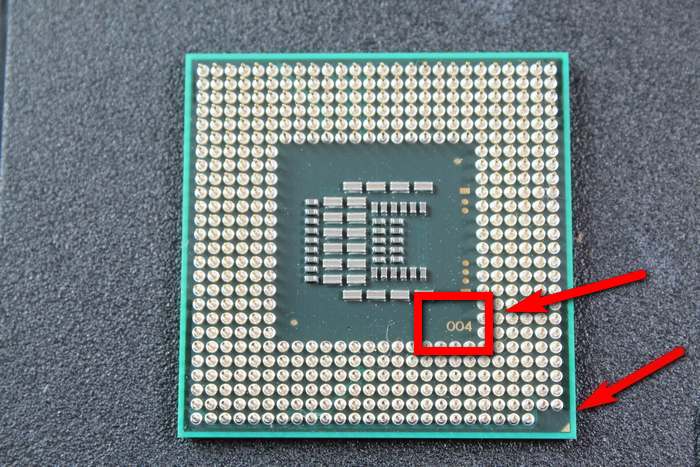
You must make sure that you align the marked corner with the socket, otherwise the CPU will not fit and could get damaged.
You can refer to the image above in order to see the marked corner of the socket, it is usually located on the top right corner.
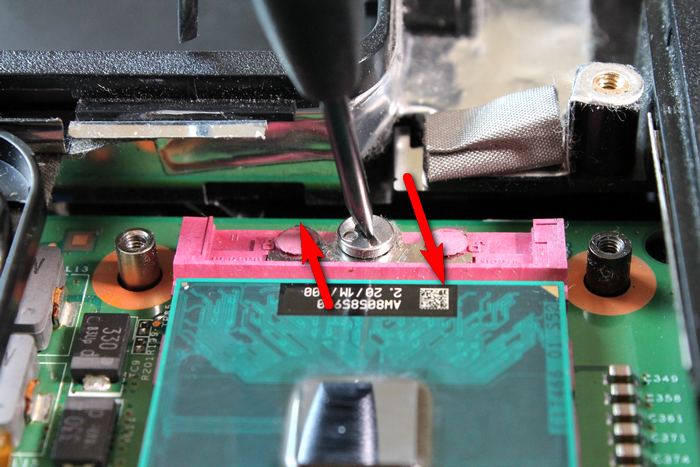
Once the CPU is placed on the socket, tighten the silver screw in a clockwise motion. Your new processor should now be installed.
Step 7
Apply a small amount of thermal paste on top of the processor so that it spreads evenly when the heatsink is installed on top of it.

Step 8:
Place the heatsink on the CPU and chipset, and then tighten the screws to make sure it fits correctly.
Step 9:
Place the back panel back into its original position, and then insert the screws in their respective positions. It is always better to take a picture of the layout of the screws, so it is easier to put the panel back into its correct place.
Now, you are done installing your new CPU! It is an extremely simple and fail safe process if you follow the instructions correctly. Some laptops do require a bit more effort because you have to remove the keyboard and the top panel in order to reveal the processor, but it is still not a very difficult process. It is always important to check the capability of your motherboard first before upgrading the CPU. The latest Intel Core mobile processors come with rPGA sockets which allow interchangeable CPUs to be used.
Download Our Free Computer Troubleshooting Guide

Leave a Reply
You must be logged in to post a comment.