A Bit of History
According to Wikipedia Bertie, the Brain is a candidate for the first video game, as it was potentially the first computer game to have any visual display of the game.
Bertie the Brain was an early computer game, and one of the first games developed in the early history of video games. It was built in Toronto by Josef Kates for the 1950 Canadian National Exhibition. The four-meter (13 foot) tall computer allowed exhibition attendees to play a game of tic-tac-toe against artificial intelligence. The player entered a move on a lit keypad in the form of a three-by-three grid, and the game played out on a grid of lights overhead.

in front of Bertie the Brain
at the Canadian National Exhibition in 1950.
The machine had an adjustable difficulty level. After two weeks on display by Rogers Majestic, the machine was disassembled at the end of the exhibition and forgotten as a curiosity.
Download Our Free Ebook Building Cheapest Gaming PC in 2021

Today this game we can play on a smartwatch and a personal computer we can play various games including driving simulation, strategy or fly in cosmos.
Though, every gaming computer costs money; the better it is the more it costs. Of course, it’s not that much money as used to be a decade ago, but still.
Let’s see what we can get spending about 100 USD.
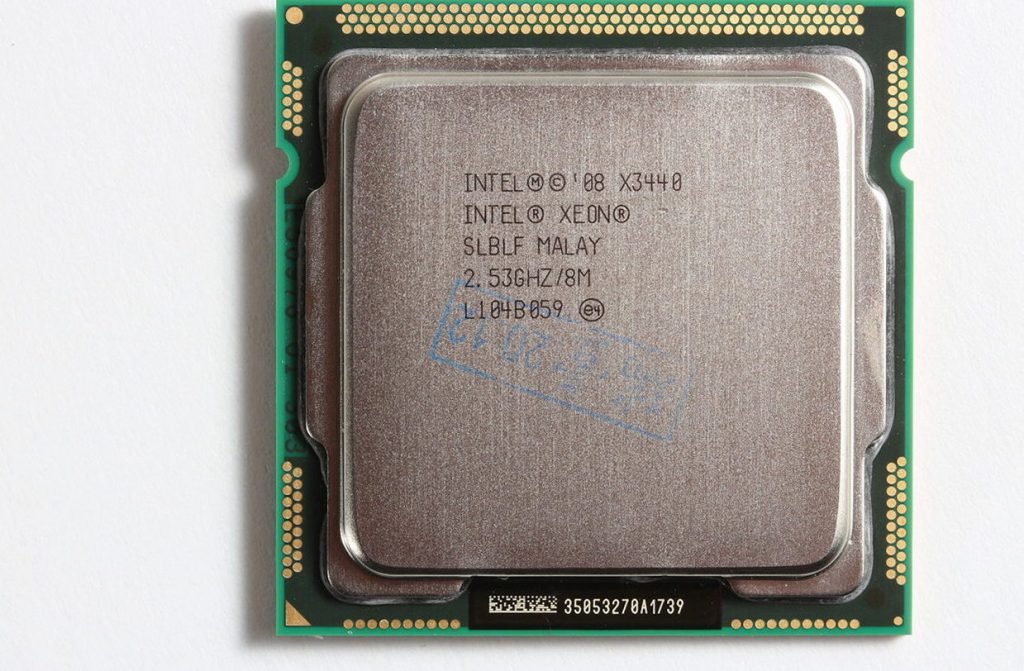
My first choice would be an Intel Xeon Processor X3440 which has four cores and eight threads and needs an LGA1156 motherboard.
The most difficult moments in gaming PC assembly are two things: to fit a heat sink on the processor and to fit in the I/O shield. I will explain the I/O shield a bit later.
Doy you need help with computers. Please fill in the form below and we will do our best to help you
Sourcing parts
Every gaming PC needs these components:
- A processor (10 USD)
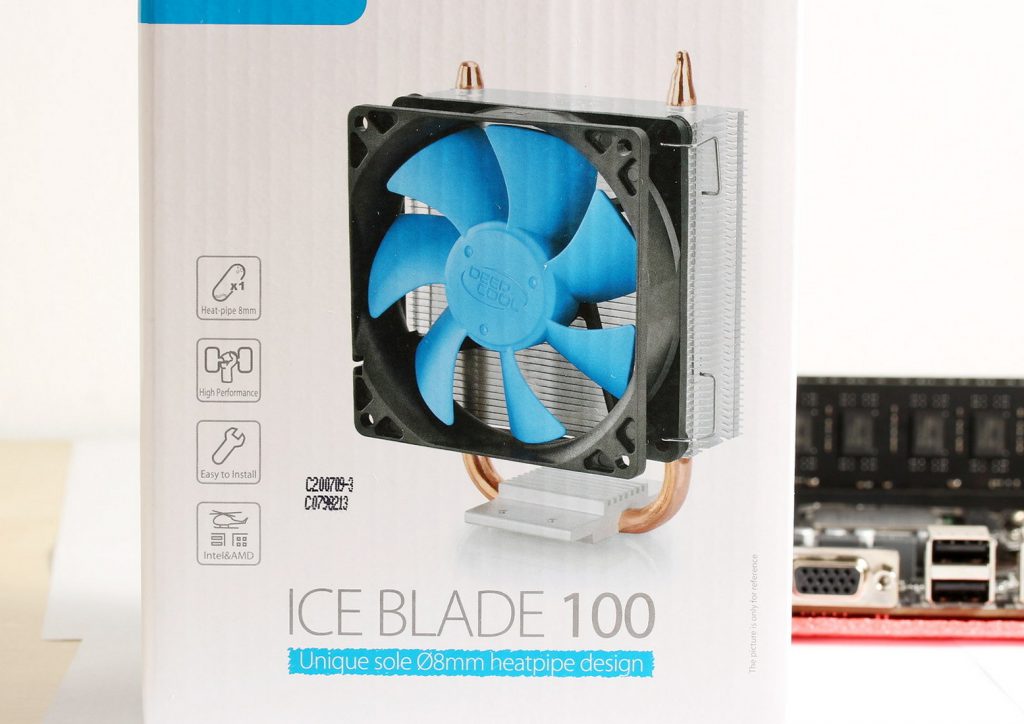
- A processor heat sink (10 USD)
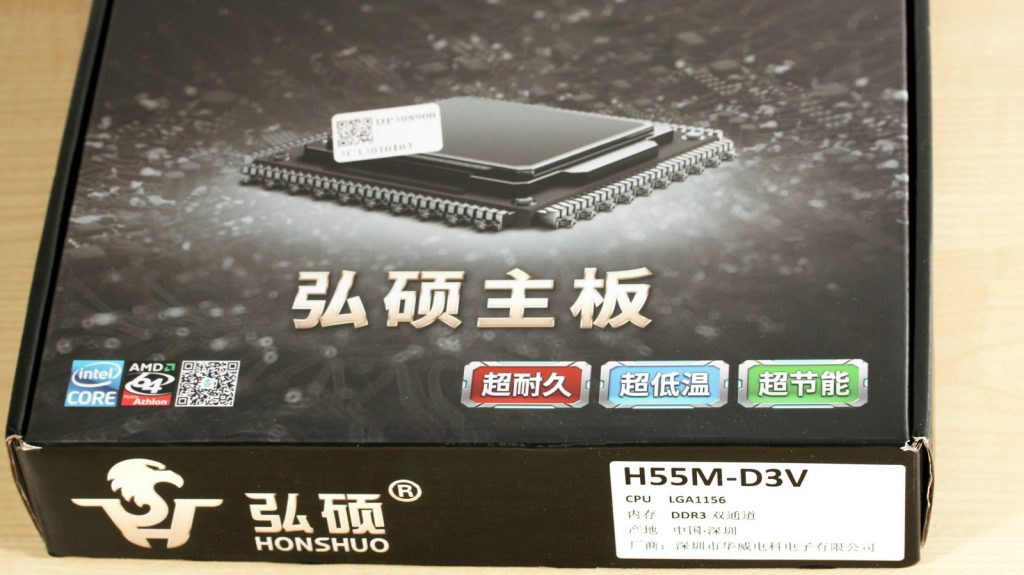
- A motherboard (30 USD)
- Some memory (RAM, 8GB DDR3, 25 USD)
- A Hard Disk Drive or SSD (solid-state drive, 26 USD)
- A Case (15 USD)
- A graphics card from Aliexpress or a used card from eBay (GPU, GTS 450, 30 USD)
- A keyboard, a mouse and probably a DVD drive if you want to have games on disks.
Let’s see if we can get all these components spending about 100 USD.
The Processor
My first choice would be an Intel Xeon Processor X3440 which has four cores and eight threads and needs an LGA1156 motherboard. The price is just 10 USD on Aliexpress.
Processor heat sink
This motherboard has an LGA1156 socket and the processor also is LGA1156. The heat sink also must be for this LGA1156 socket. There are other sockets like LGA2011 that are not compatible. Fortunately, all heat sinks come with markings on what socket they fit. Usually, the information is in the description if you buy them online.
Motherboard
I have chosen an H55M motherboard from Aliexpress too for 30 USD. Here is the link for you to check it.
Memory
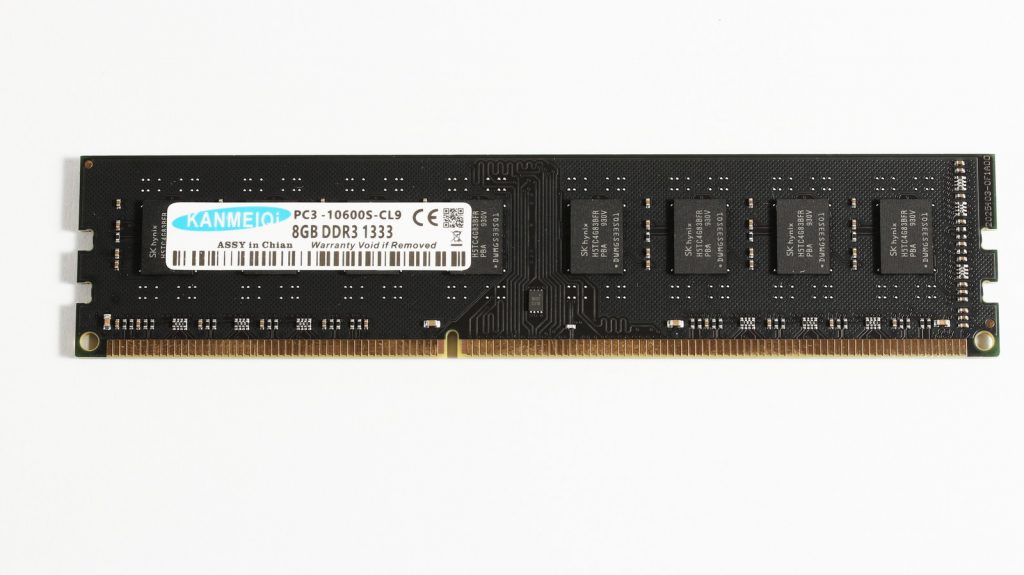
The memory you can source locally on eBay or Aliexpress. This motherboard needs DDR3 and the one I have supports 16GB of memory. Interestingly on the listing, it says that it supports just 8GB memory. On Aliexpress, 8GB DDR3 memory modules cost around 26 USD.
Storage
For storage, you can pick a used or new SDD or a used or new HDD. Now a new 256GB SSD on Aliexpress costs 26 USD.
Explanation: SSD stands for solid-state drive and HDD stands for Hard Disk Drive.
I do not recommend using less than 256GB storage as some games are 20GB or more in size. In the 256GB drive, you can fit easily around eight games.
As storage, you can also use a Hard Disk Drive which will be cheaper. In 2021 you can pick up a new 500 GB Hard Disk Drive on Aliexpress for about 22 USD.
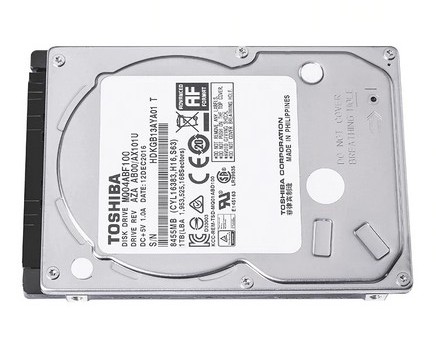
In a drive of 256GB, you can fit around eight games, in a 500GB drive – 16 games, and in a 1TB drive – around 30 games.
Newer games will be bigger in size so the number you can fit will be lower.
Computer Case
Please choose the computer case that has enough space to accommodate a longer graphics card. In the future inevitably you will upgrade the graphics card and it may not fit in the case that is too narrow. This case is a midi case and has plenty of space inside.

The Graphics Card
This is probably the most important part of our system. As we are making a cheap gaming PC, I had a graphics card that was sitting in my storage for some time. This is the Gainward GTS450 with 1GB of DDR5.
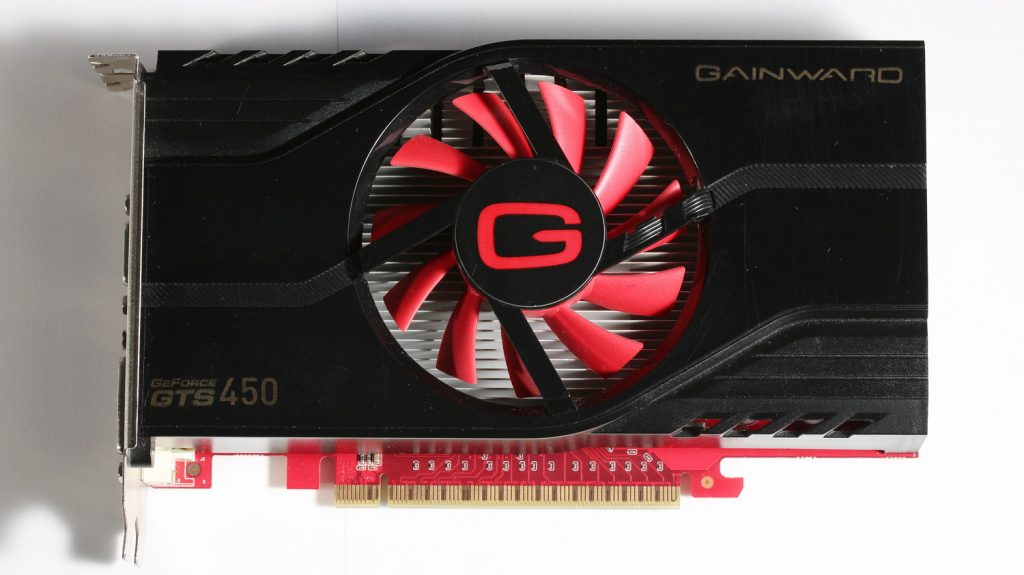
On eBay, it costs around 30 USD and there are a few of them so they are still around for sale. Also, there aren’t many cheap graphics cards on Aliexpress. The price starts at around 70 USD for a better gaming graphics card.
Keyboard, mouse and DVD drive
You can source all these peripheral devices locally for cheap or somebody might give them to you. Ask companies that get rid of office equipment as sometimes they can give you the whole computer system without a hard disk drive.
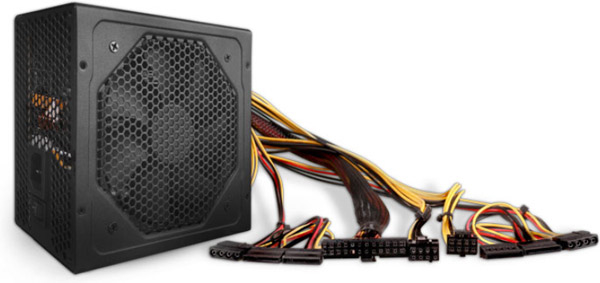
Power supply
For a power supply, I decided to use a new unit made by NOD model A550. It is a 550 W power supply as I most likely will upgrade my graphics card to a better one and it will drive more power.
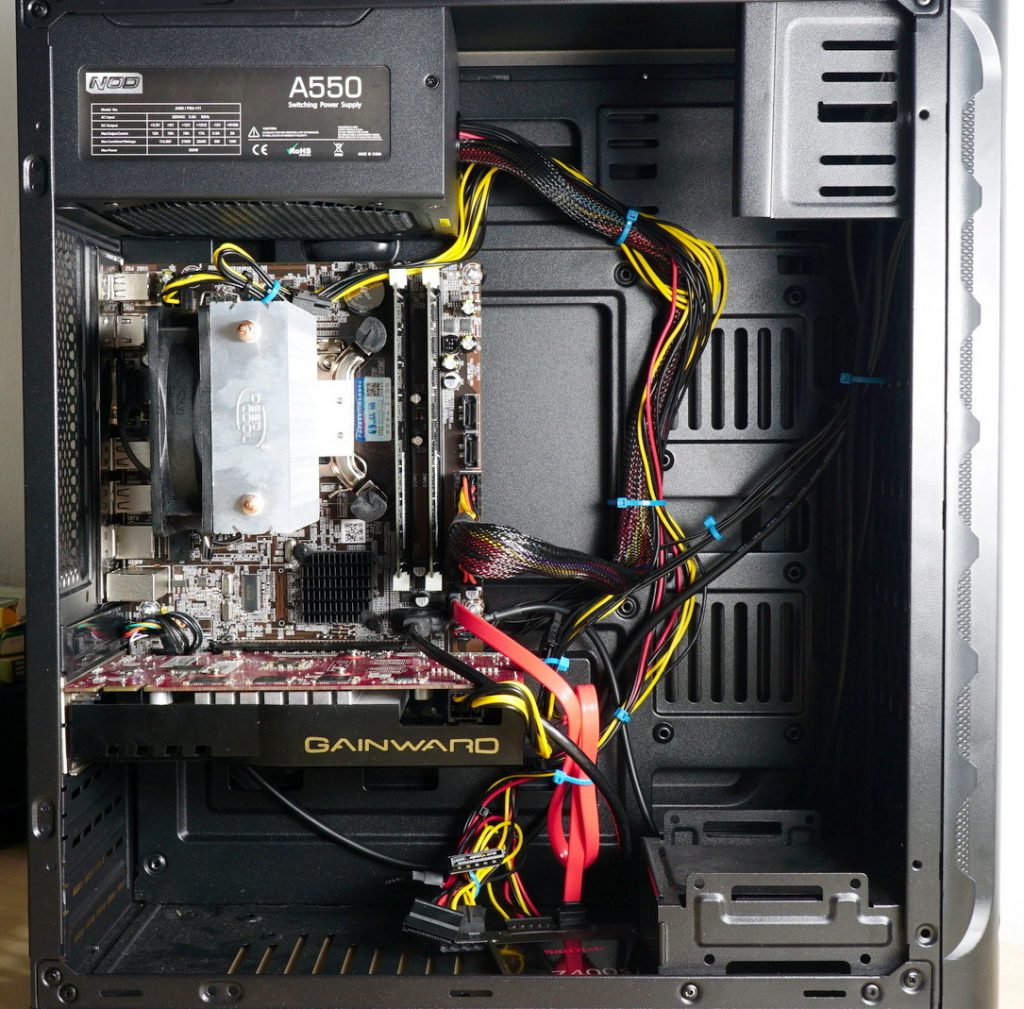
Assembling the system
After waiting two months for the parts to arrive we can now continue to assemble our system.
Fitting our processor to the motherboard
There are different ways to fit everything together. I would start by fitting the processor and its heat sink on the motherboard first. The difficult part will be fitting the heat sink on the processor. So, I do not want you having problems inside the case and you probably will end up taking out the motherboard anyway.
So, take the motherboard and grab your processor.

There will be a latch and a bracket that holds the processor. Undo that latch and take out that protective plastic. The protective plastic is there to prevent any foreign things from entering the socket and damaging small metal pins.
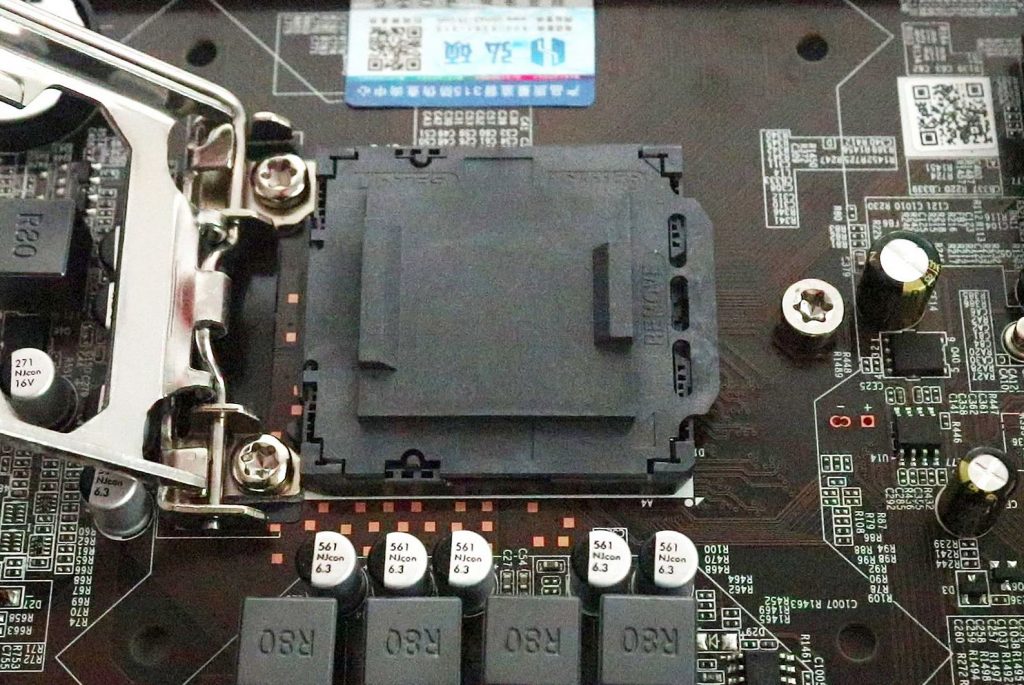
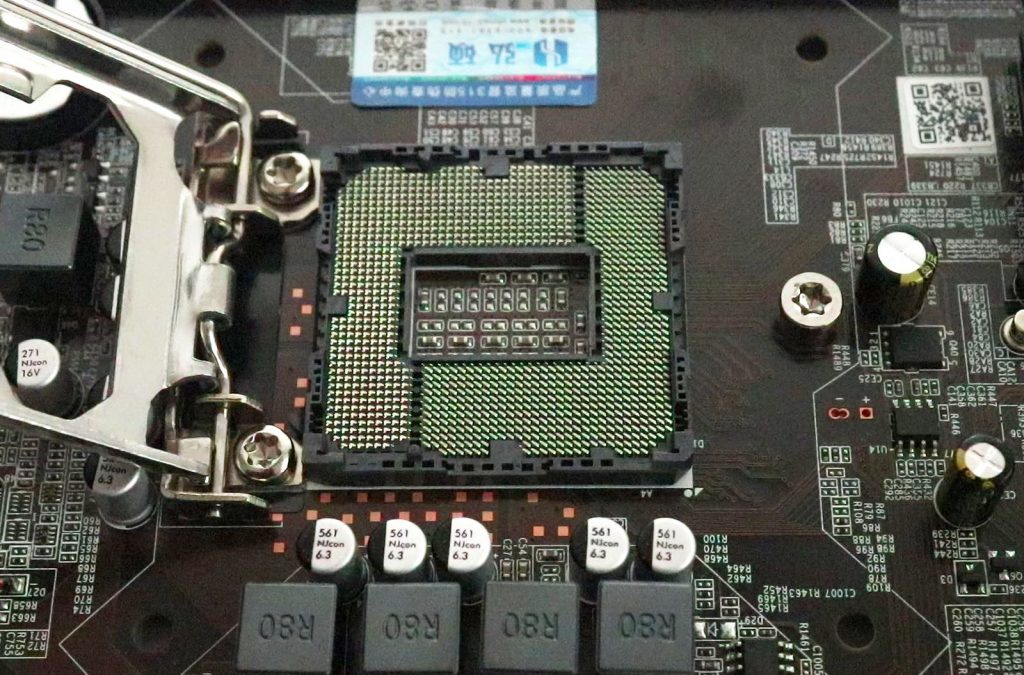
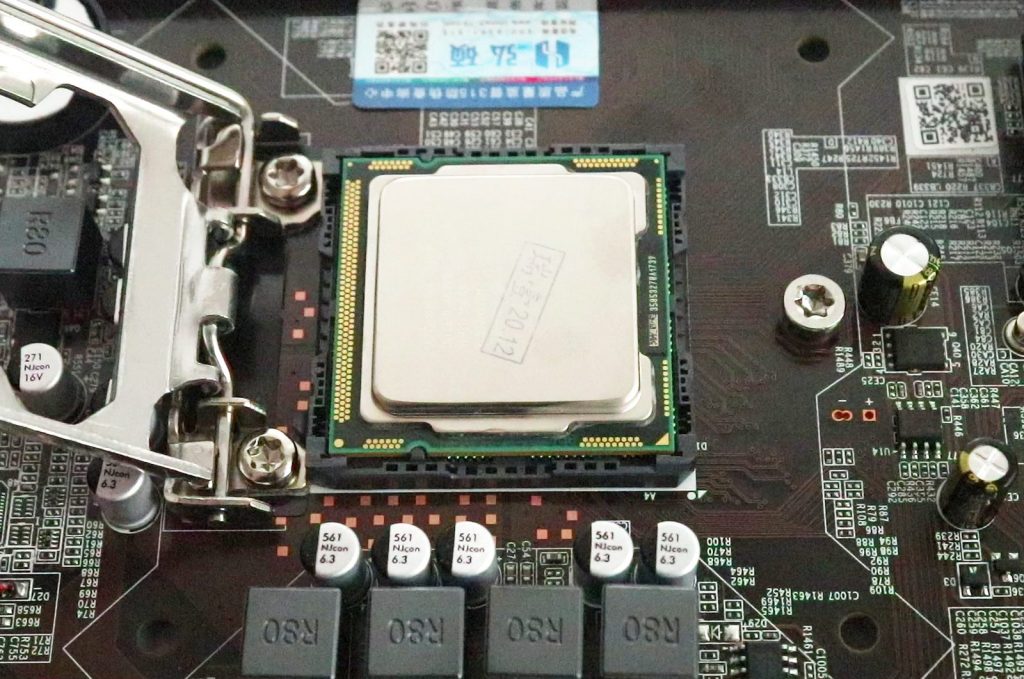
Place the processor in and close the bracket.
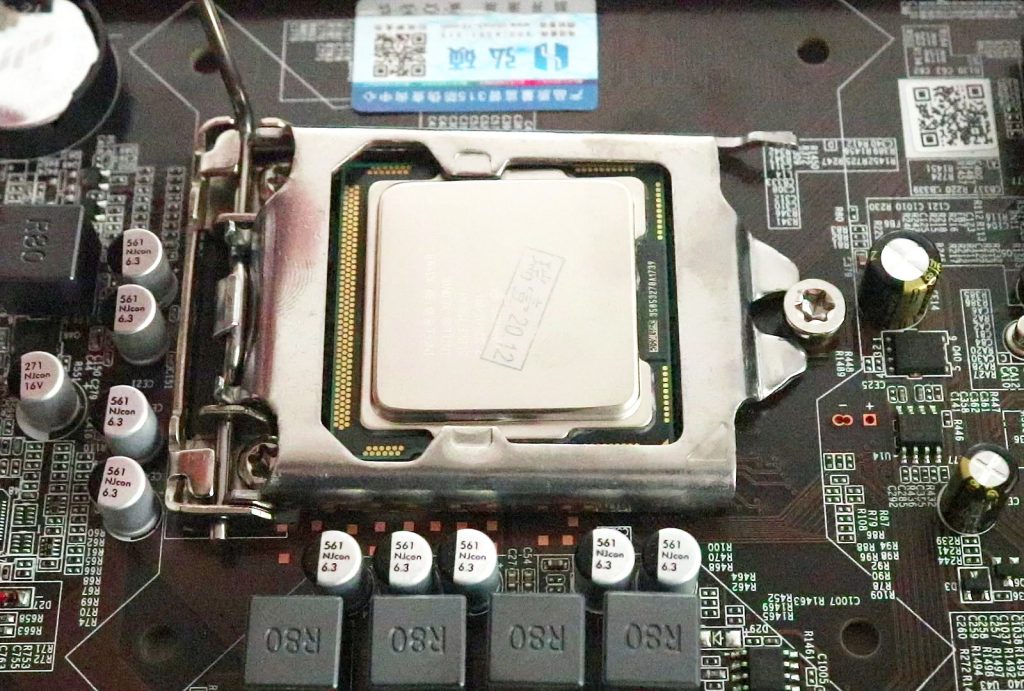
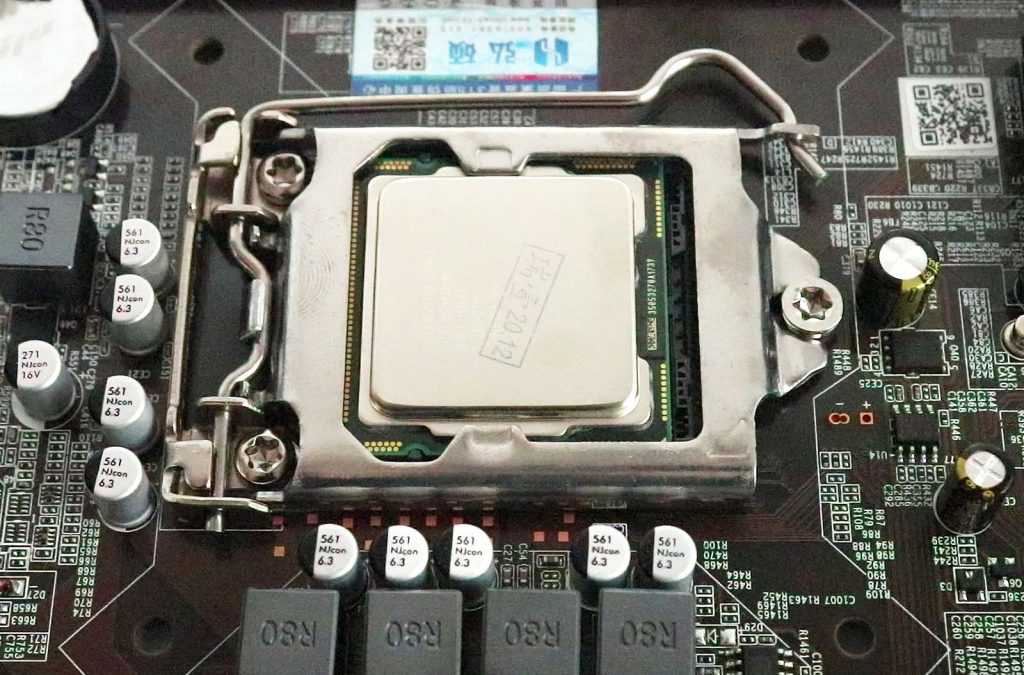
It should look like in the image above.
Fitting heat sink on the processor
Honestly, this is probably the most difficult task.
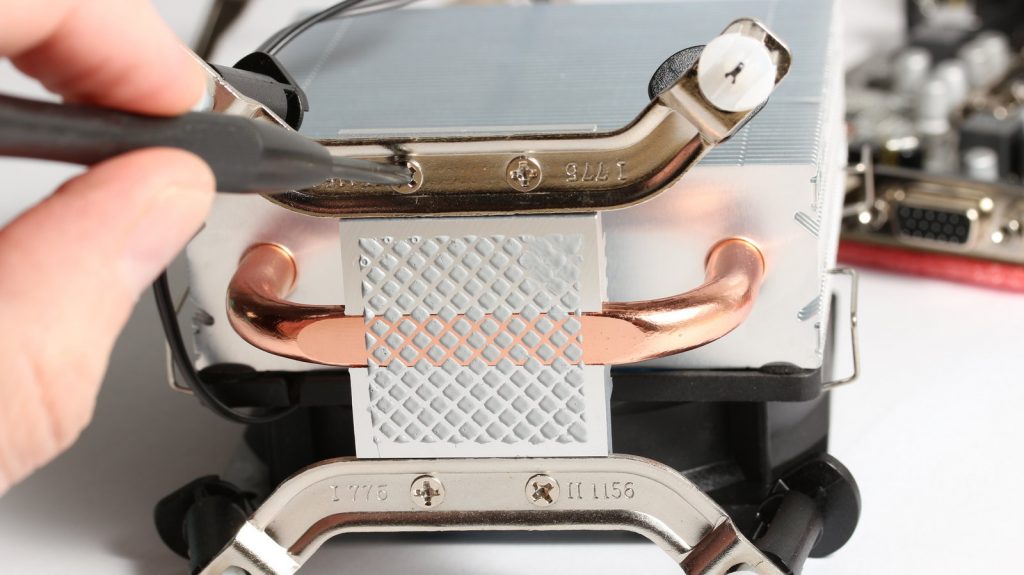
Assemble the heat sink. It will come in a few parts and you will need to fit a metal bracket to the main part.
Most new heat sinks have a silver paste applied to them. If the paste is not applied, buy a silver heat sink paste.
Remove any plastic protection or tape that may be on that pad with the silver paste. Carefully check the paste with a finger. If it leaves a silver mark, everything is good and we are ready to place it on the processor.
Now turn those black cylinders clockwise and place all the assembly on the processor. Align the assembly that the clips fit into the four holes.
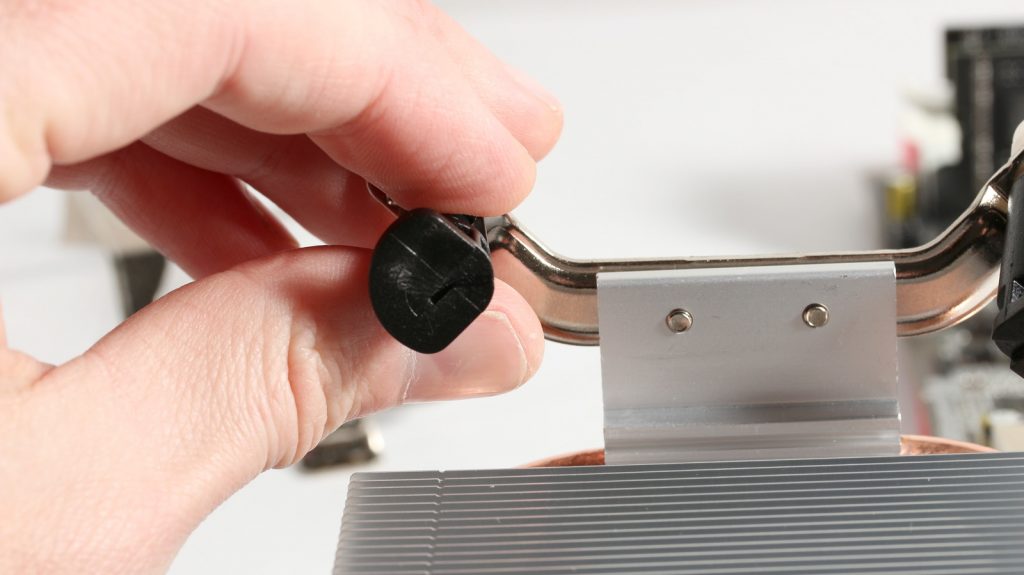
Push those black plastic cylinders down till you hear a click.
Make sure that there are no gaps at the bottom. If there is a gap, turn that black cylinder anticlockwise, move it up. After that turn it clockwise and push it again down. You should hear a click and there should not be any gaps at the bottom where that white part is.
It’s important to make sure the heat sink assembly sits correctly as if only one side is not sitting properly the processor will not get proper cooling.
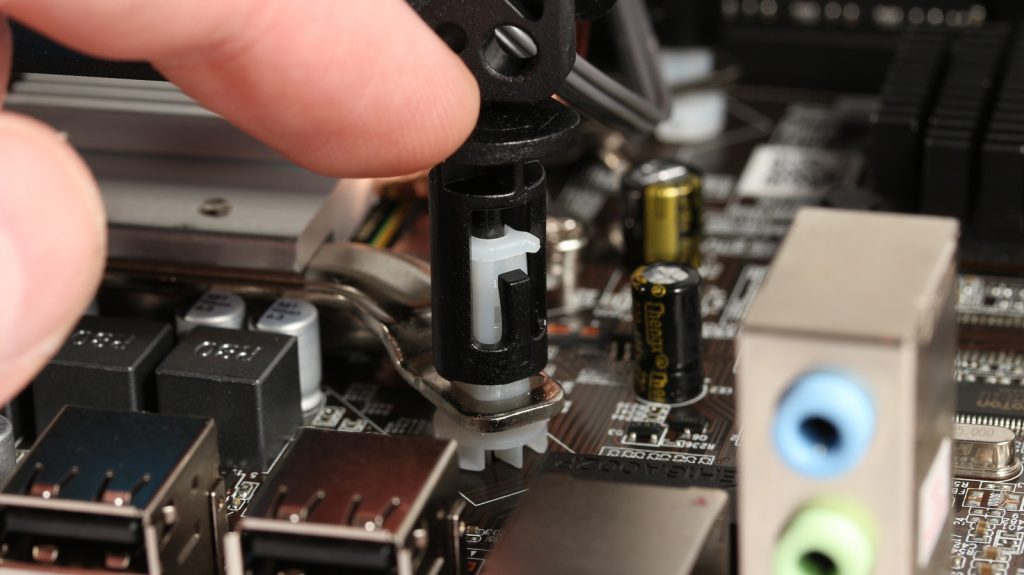
Fitting Input-Output Shield
This is a difficult part; please wear work gloves if you do this the first time.
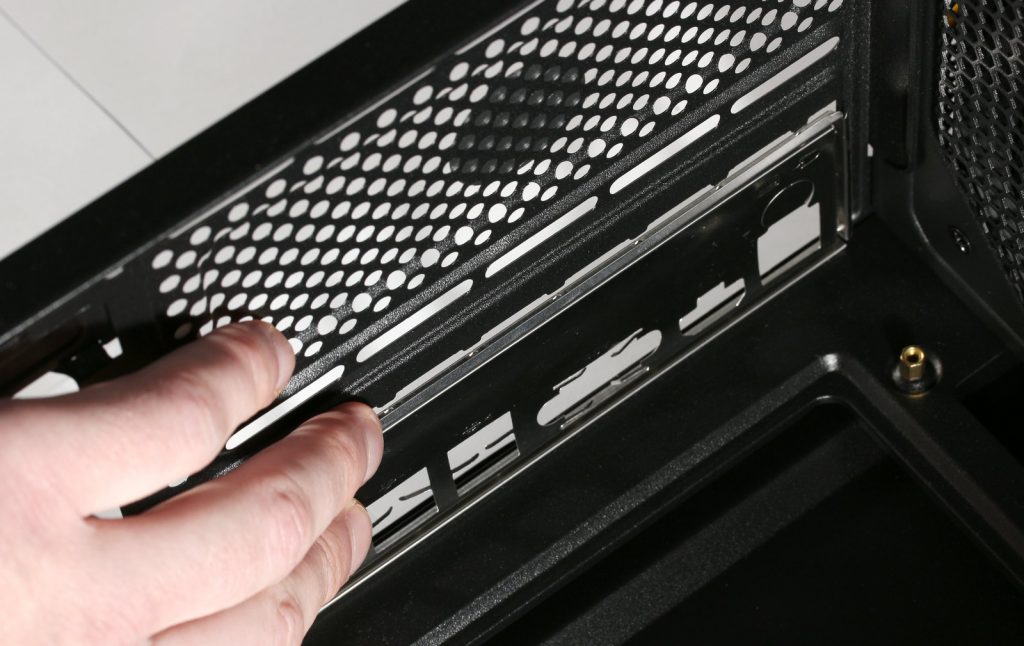
This is the shiny metal piece that comes with the motherboard. It usually has sharp corners, so be careful.
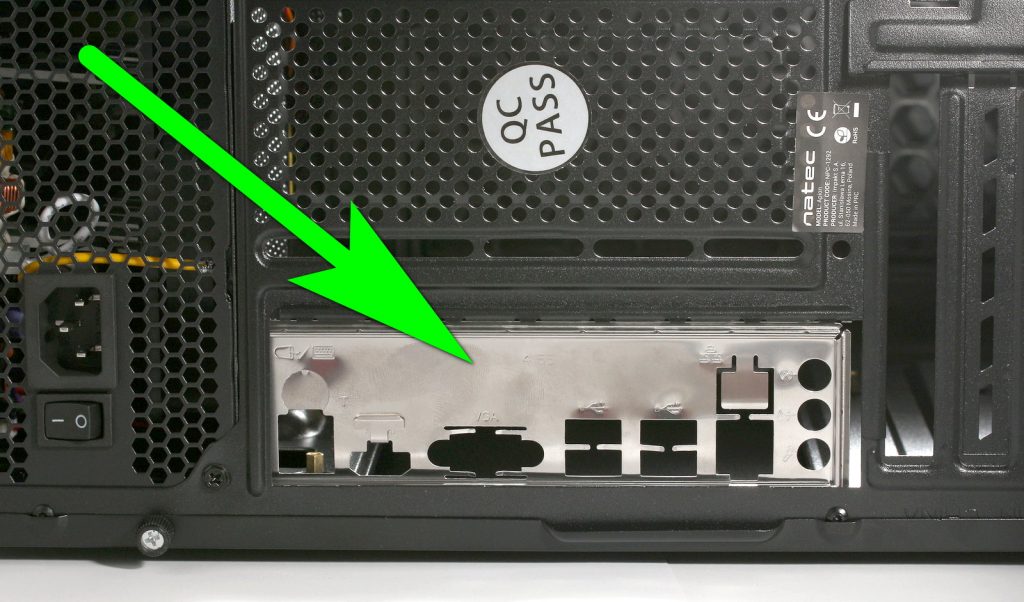
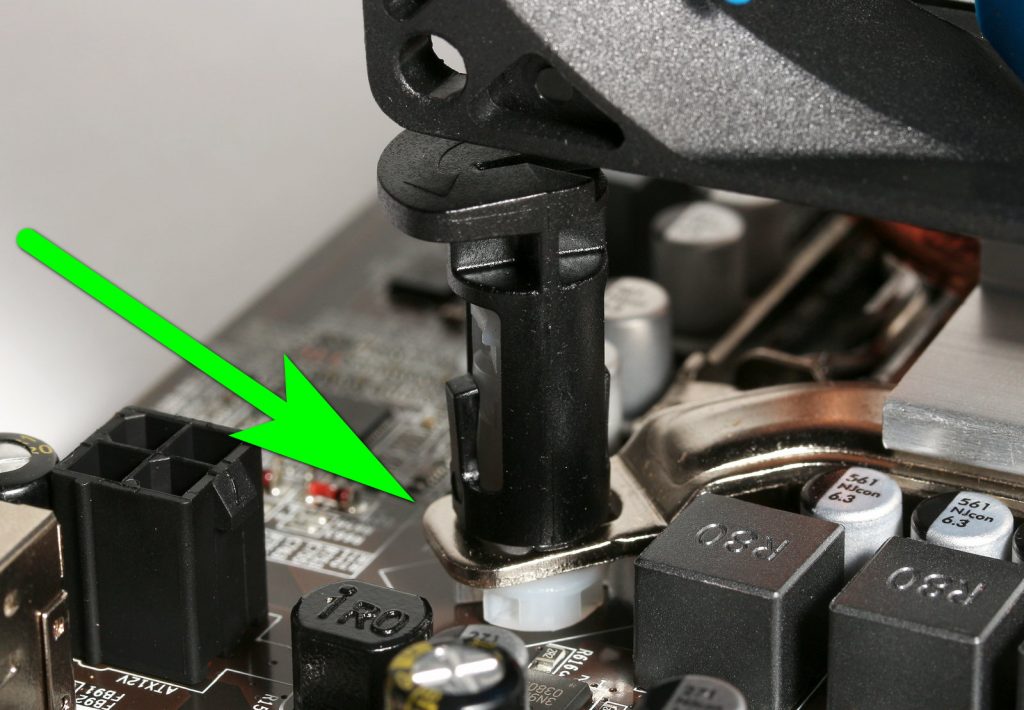
Fitting the motherboard into the case
Place the motherboard into the case. There should be metal posts that align with motherboards screw holes. If those posts do not align push the Input-Output shield a bit out. Usually, the metal IO shield is a bit bent and prevents the motherboard from sitting properly.
Screw in screws that are provided with the motherboard.
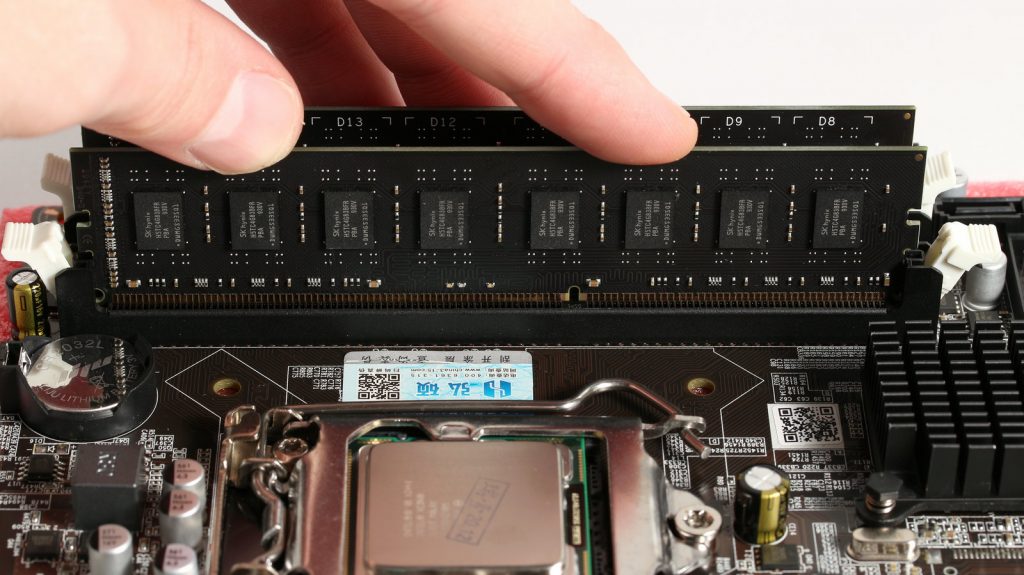
Memory (RAM) fitting is straightforward. You grab the stick and push it into the slot. Just make sure this is the right memory module and it is positioned correctly. There is a notch and you will not be able to fit it in backward.
Fitting in our hard disk drive
Hard disk drive or SSD (solid-state drive) is straightforward. We will need the actual drive and a SATA cable. The SATA cable usually is supplied with the motherboard and it is the red one with the black plugs on both ends.
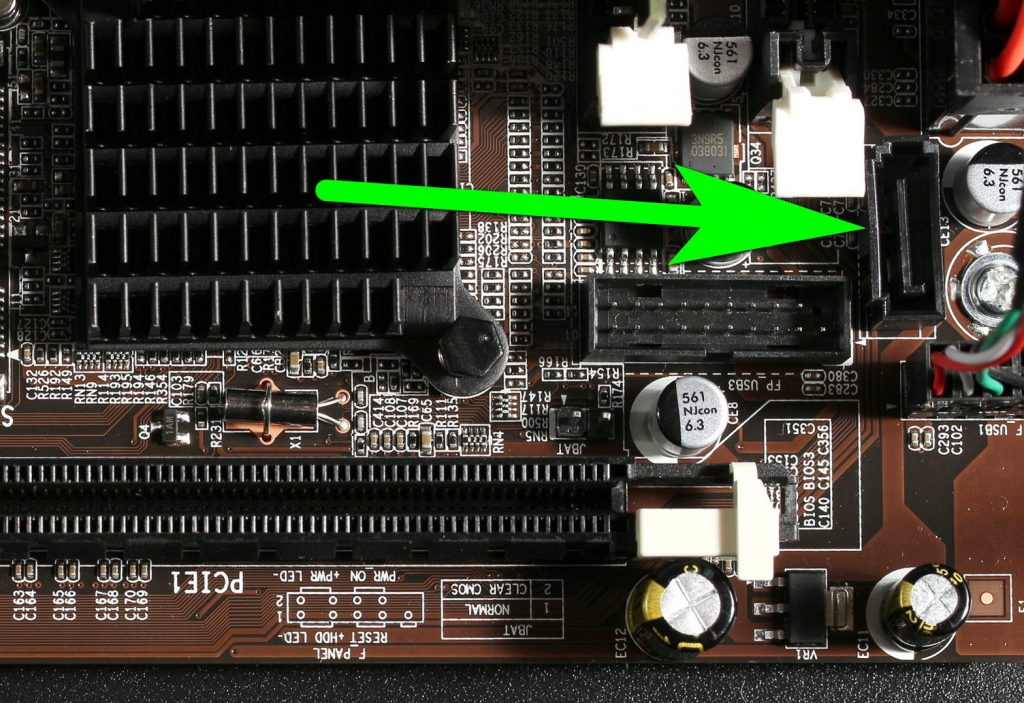
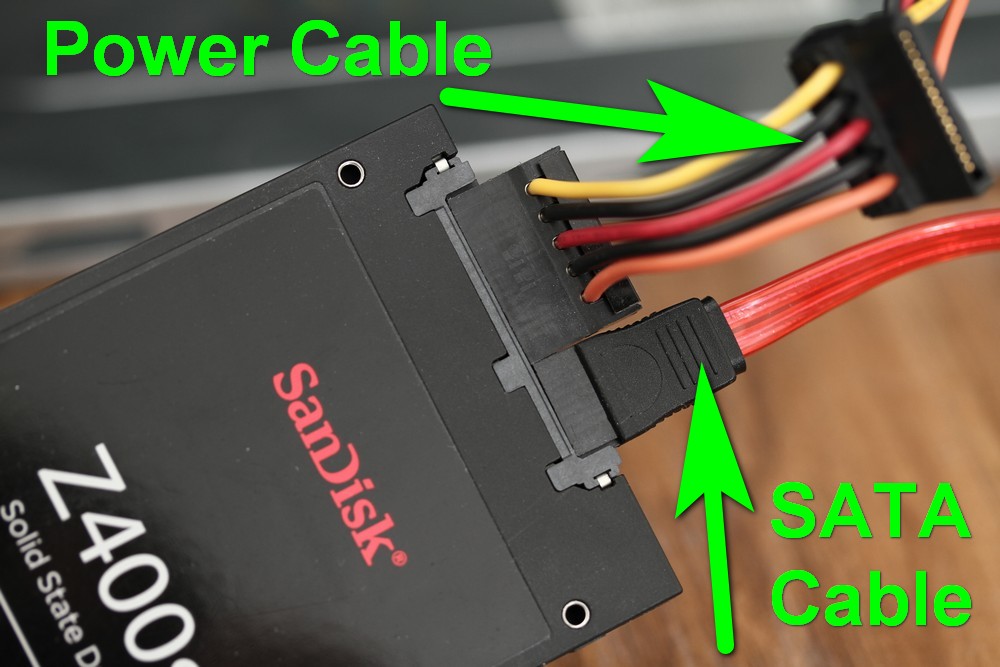
You also will need to connect a power cable.
If you use an SSD drive, just leave it in there to hang or you can use a bit of double-sided tape to stick it to the metal.
There is a bay for a bigger hard disk drive that you can use in case you use the big desktop 3.5-inch hard disk drive.
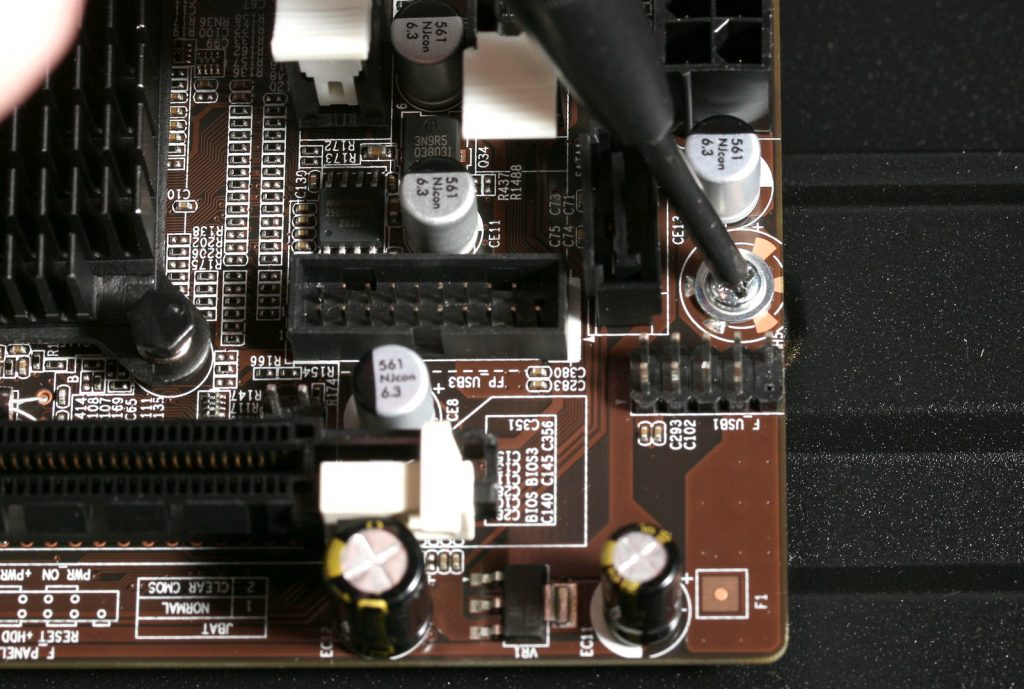
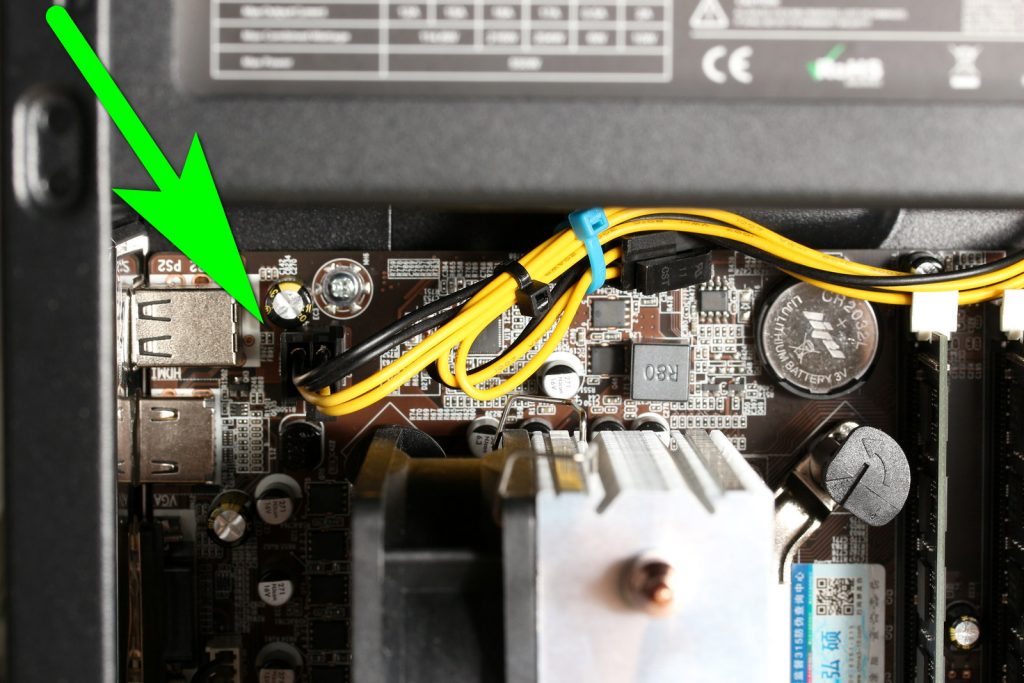
Connecting power to the motherboard
The motherboard gets its power from the power supply through a cable that has a flat plug.
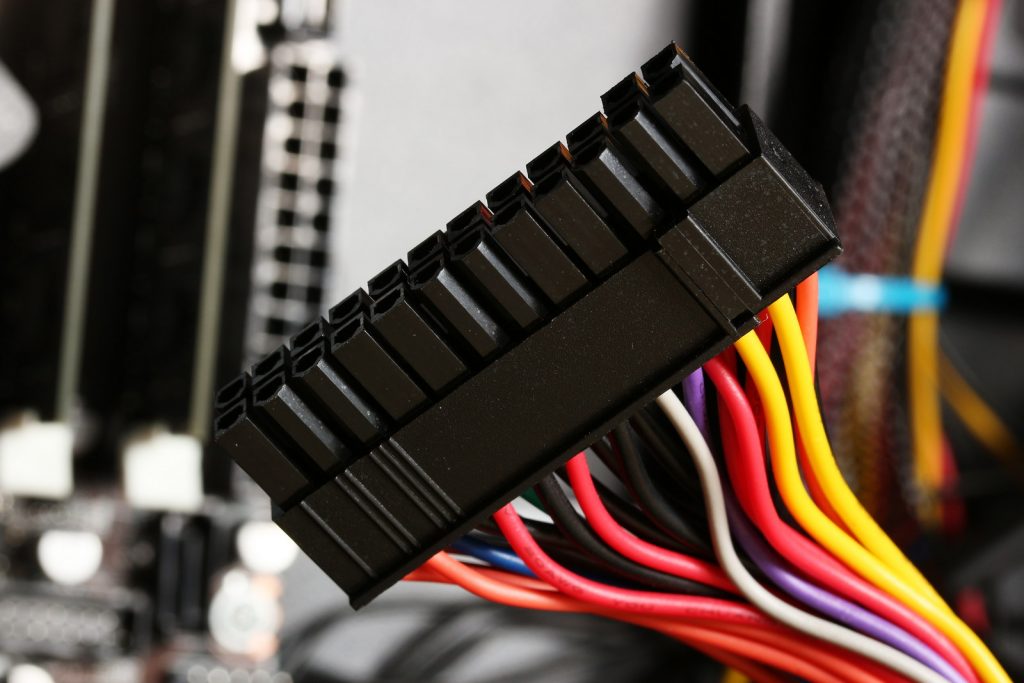
On the motherboard, you will find a socket to plug it in. Usually, it is found near memory modules.

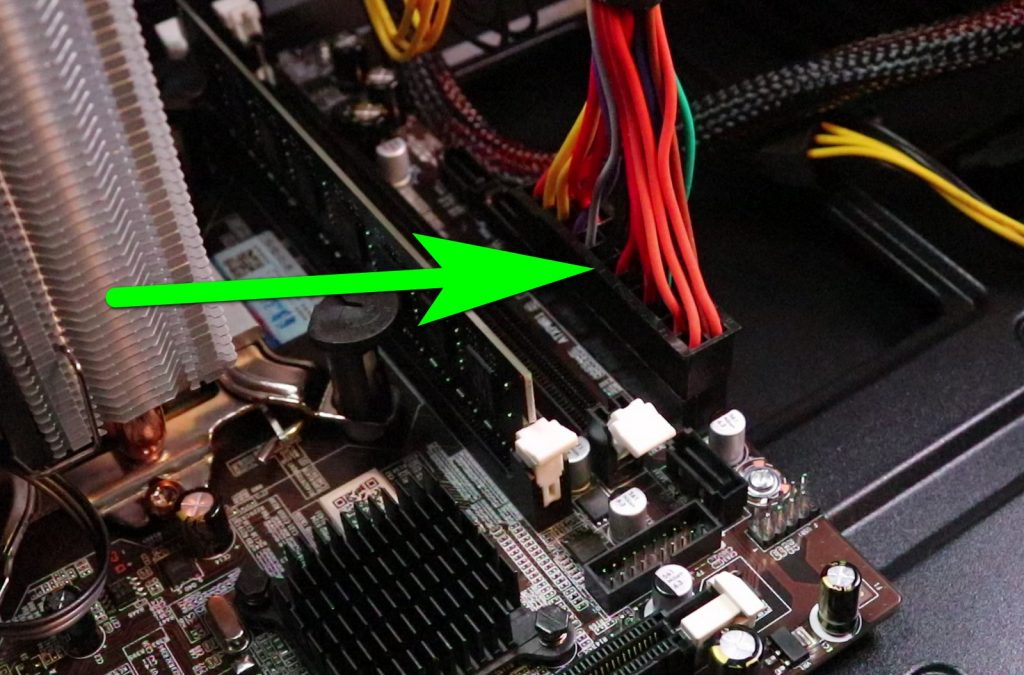
There is another power cable that we need to connect: a processor power cable that usually has four pins.
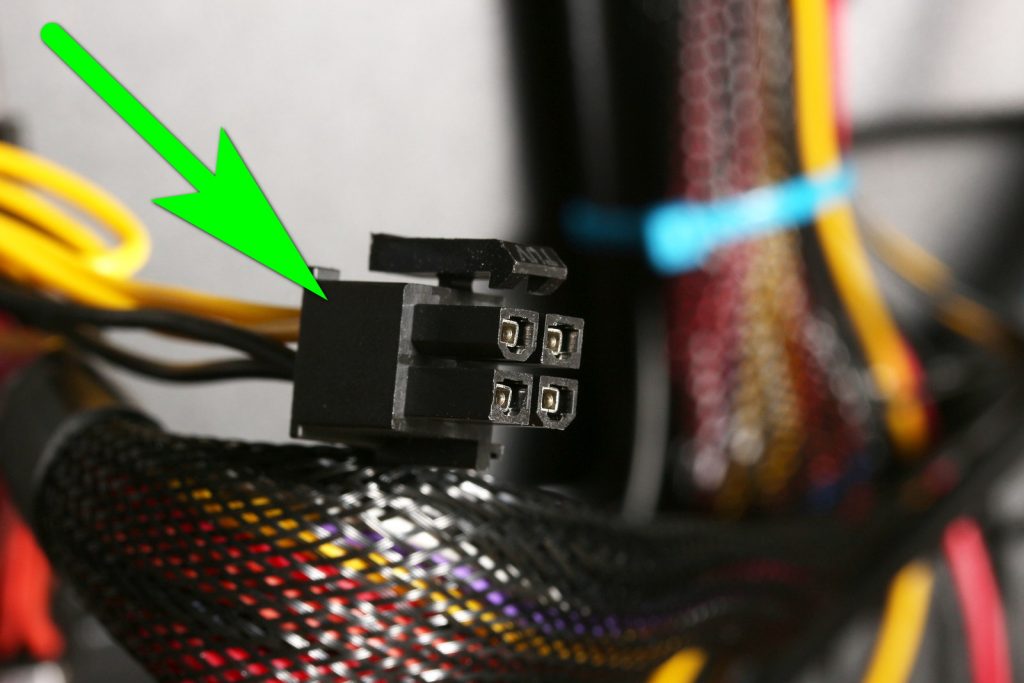
It goes to one place that usually is difficult to reach. Fortunately, you will hear a click when it plugs in properly. That place usually is next to the processor.
Front panel wiring
There will be a bunch of wires with small market plugs. Those are the front panel interface; power on button, reset button, etc. Usually, there is one special place on the motherboard to plug these wires. There should be even markings to let you know which wire goes where.
There will also be USB wires and there will be marketplaces on the motherboard that say USB1, USB2, etc. Plug these plugs in the places marked.
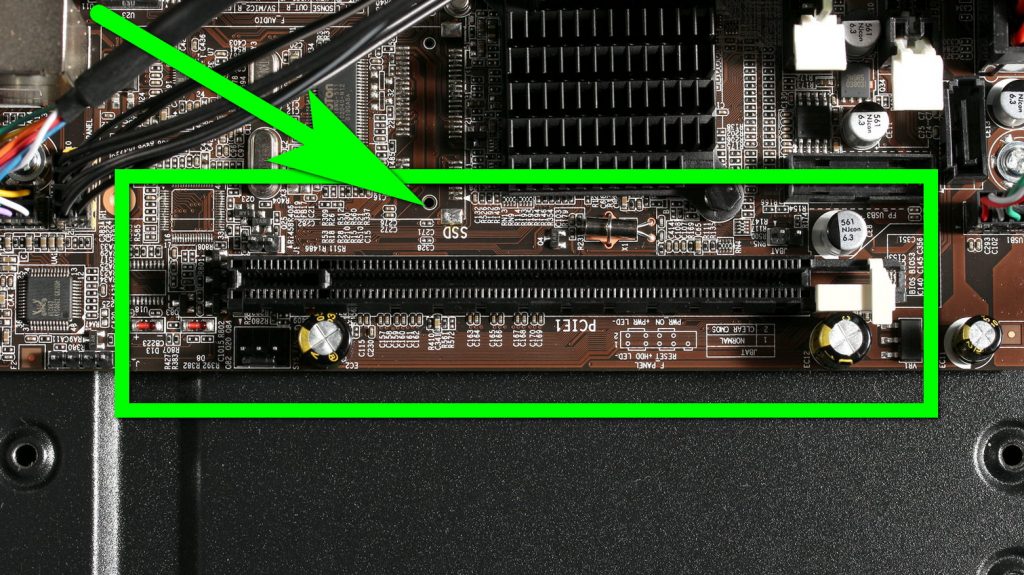
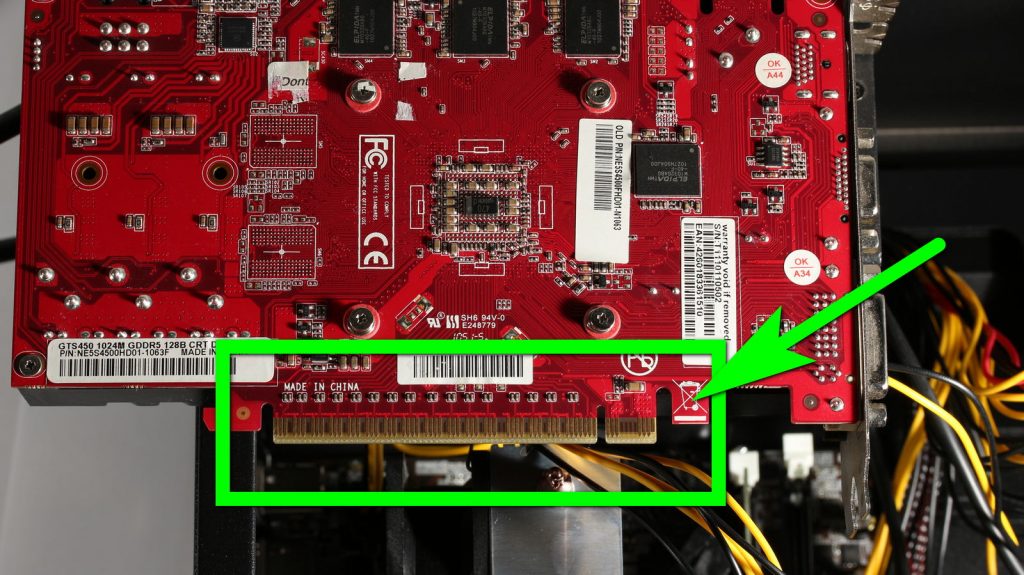
Fitting in our graphics card
There is a slot that is used by most graphics cards today. It is called PCI Express.
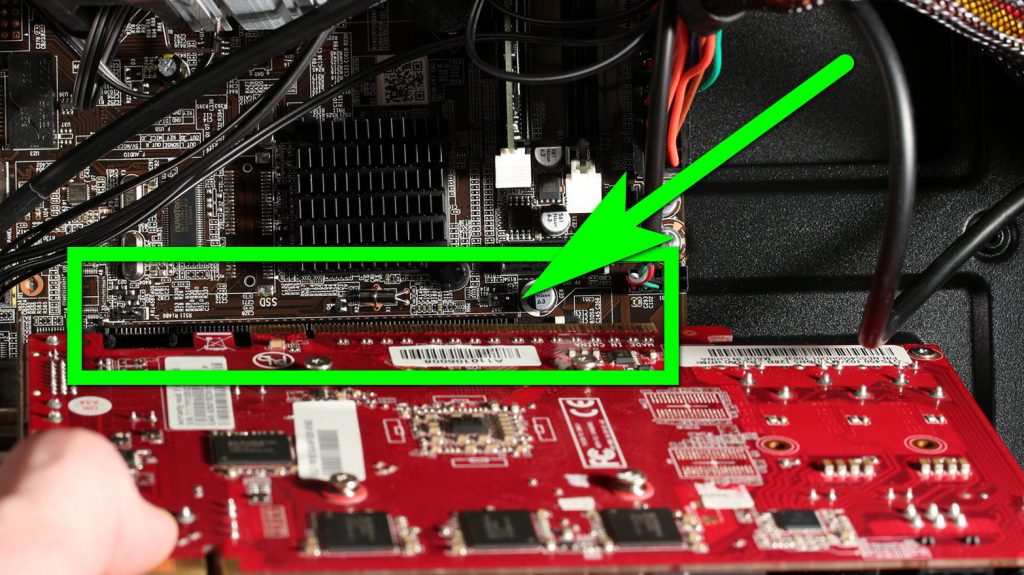
There is a clip that you need to move before you fit the graphics card. In the picture below it is a white piece of plastic.
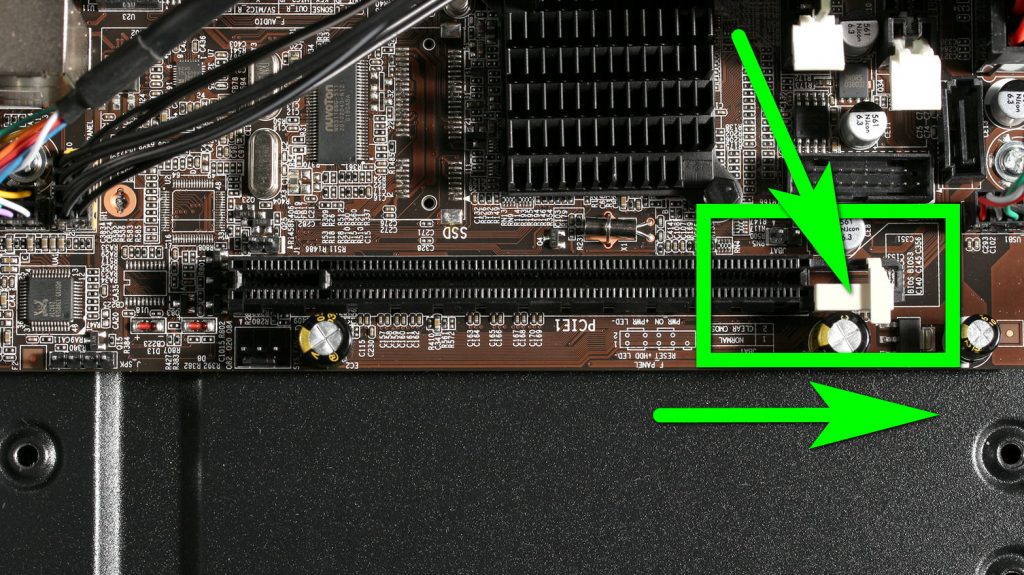
After fitting the card in, move that white piece to the left.
We need to align our graphics card with this slot and push the card down.
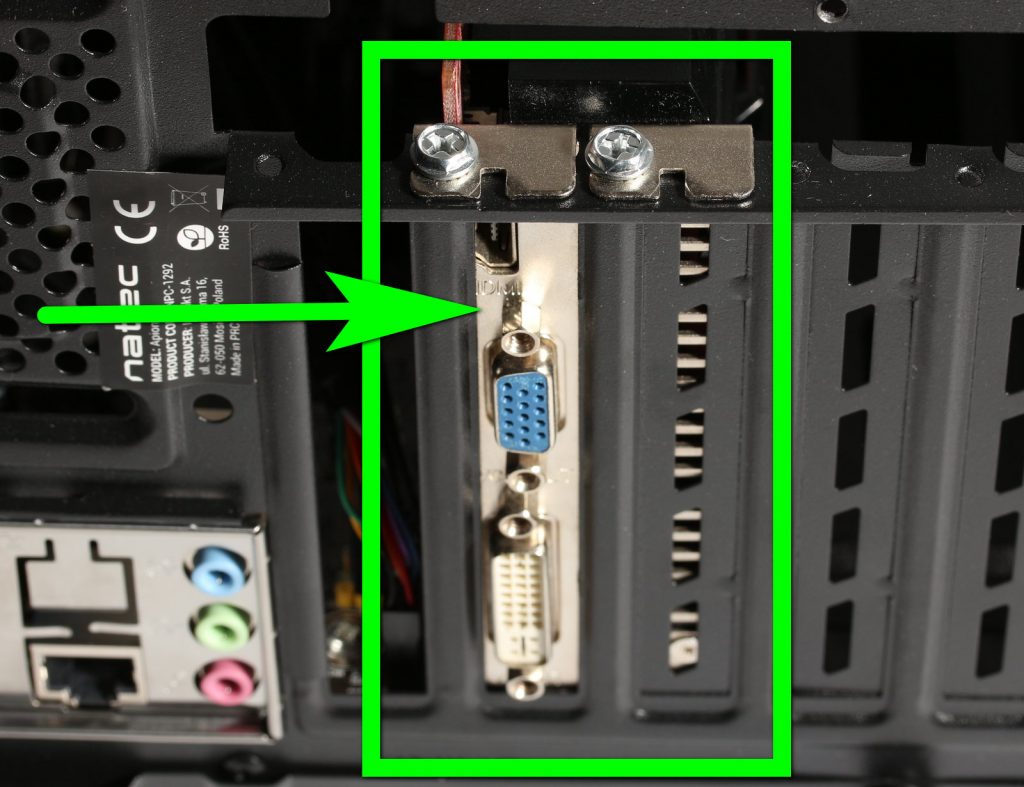
Now secure the card with the two screws that are at the back of the case.
Do not forget to fit more graphic card power. Usually, this is a cable that has six wires. If your power supply does not have such cable you can buy an adapter. This is usually SATA power to PCI-E (6 + 2Pin) or MOLEX to PCI-E (6 + 2Pin) adapter.

Installing Windows, getting drivers and finishing up
We will get a Windows 10 for this build. Windows 7 is getting old already and if you use it there will be compatibility problems.
One important thing to know about these non-branded builds is that Windows 10 will not activate automatically. We need to buy a key either from Microsoft or from someone that has a key from the scrapped computer.
Windows 10 is very good at getting the correct drivers. We need to download and install drivers only for our graphics card.
Download Our Free Computer User And Troubleshooting Guide

Leave a Reply
You must be logged in to post a comment.