A short guide on how to do Acer laptop DC Jack repair
DC jack types
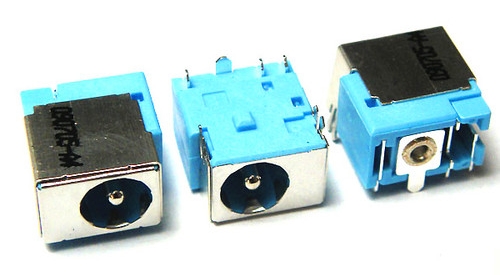
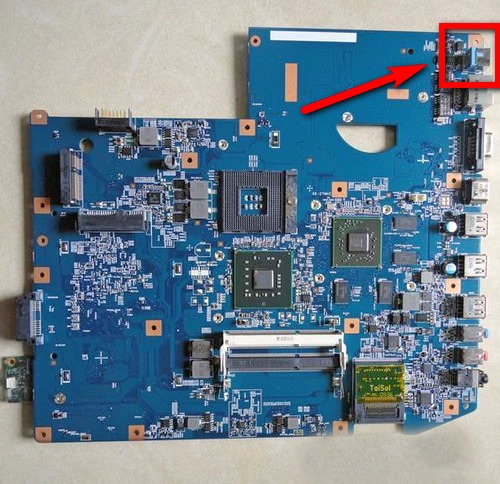
Acers have two types of DC jacks. The first one is when the DC jack is soldered on the motherboard, in other words, on the PCB. There can be several variations of DC jacks which include pins from three to six. The main pins on the DC jacks always come in threes. The central pin, which is the “+” wire and the two side pins.
Doy you need help with computers. Please fill in the form below and we will do our best to help you
Download Our Free Computer Troubleshooting Guide

The two pins are on the side of the jack which is the actual metal casing. The central pin is always a thick wire. Sometimes, the jack is equipped with a switch that senses the plugs presence. The bad thing about this is that the DC jack with the switch is more fragile.
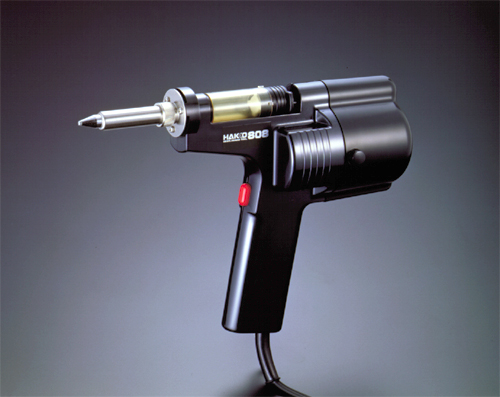
To desolder these, we use a desoldering gun or desoldering pump. It is best to use a desoldering gun because of its convenience and quick work speed.
The other type is when the DC jack is on the chassis or on plastic, and when the wire connection connects the DC jack with the motherboard. There are many places on a laptop where the DC jack can be located. But, keep in mind, the DC jack is never located on the front.
On modern laptops, the DC jack is sometimes designed as a part of the hinge assembly. As seen below, this is the DC jack from an Acer Aspire 6930.
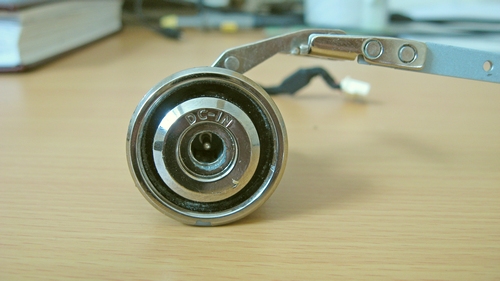
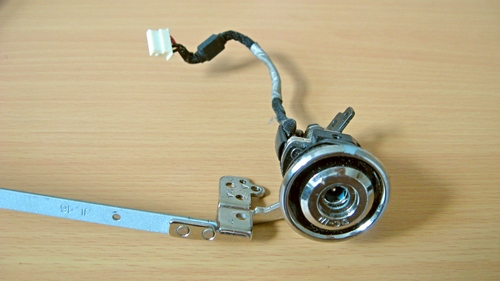
In this case, there is the usual DC jack that is placed in the assembly, and this DC jack connects to the motherboard with wires. There is no soldering involved when replacing this type of DC jack because it already has wires attached to it.
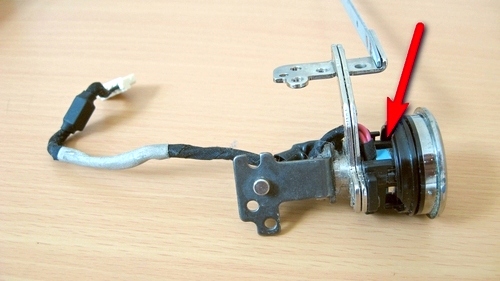
Attached wires to DC jack
I personally have not seen an Acer plug or DC jack with three wires, from what I have seen, they always have two wires (it can be four wires but each group of two are the same). One is “+” and the other is “-” or the two are “+” and the other two are “-“.
To replace the jack here, we need to unscrew a couple of the screws that hold the plastic part to the hinges; the jack should then pop out. If the new jack has wires attached, then we do not need to solder it. If the jack has no wires, then the old wires need to be soldered directly to the jack.
Just remember to not mix the wires, the red wire must be soldered to the central pin, and the black wire must be soldered to the casing pin.
DC jack construction
The jacks metal casing is a power transfer that always is “-”. In all cases, when replacing DC jacks on laptops, there will be disassembly work involved. Please refer to a disassembly guide for your specific laptop which can be found in its laptop model specifications, user manual, or online in guides made by enthusiasts. This site does not try to cover disassembly on each type of laptop model.
Though, please fill the form in below with a request for your specific laptop and we can try to help. How this all works; here is an example, if you only know the DC jack replacement but do not know any further repair steps, then take some pictures and write a descriptive text and then submit it here in the form below. When the answer is ready, it will be published here.
Leave a Reply
You must be logged in to post a comment.